I have to say that the thing I miss the most from the wheat/flour/pastry world is pies. And tarts, which are essentially little pies. Mmm... pie.
Of course, there are oodles of gluten-free pie crust recipes out there, but they are usually rather involved, and entail one already having a huge variety of different gluten-free flours on hand to whip up one little pie. Plus, pie crusts are finnicky enough to have to worry about mixing the right proportion of all the ingredients.
I was therefore super-excited when I found a pre-mixed pie crust mix, brought to your local grocery courtesy of the folks at Glutino (aka Gluten-free Pantry):
http://www.glutino.com/our-products/gluten-free-pantry/perfect-pie-crust/
One caveat to remember is that simply because something is gluten-free doesn't mean that it is good for you. This mix is loaded with super-refined flours and starches and even sugar (boo), so it is still a dessert BUT when I'm hankering for pie in a pinch, it works!
However, there are some tricks to getting this (and probably any gluten-free) pie crust to behave. Because it is lacking in gluten - which is the sticky business that keeps most flours together - it needs some help staying cohesive. The mix calls for an egg (which is an excellent binder) as well as a bunch of butter and shortening (yum) and some apple cider vinegar. Once mixed, the recipe calls for the entire mix to be wrapped and refrigerated. And that's essentially where the helpful hints end.
SO - here's a little extra assistance in whipping this pie crust into some pie-reminiscent shape:

1. Remove from refrigerator. Split dough into two halves (1 half pictured here).


Of course, there are oodles of gluten-free pie crust recipes out there, but they are usually rather involved, and entail one already having a huge variety of different gluten-free flours on hand to whip up one little pie. Plus, pie crusts are finnicky enough to have to worry about mixing the right proportion of all the ingredients.
I was therefore super-excited when I found a pre-mixed pie crust mix, brought to your local grocery courtesy of the folks at Glutino (aka Gluten-free Pantry):
http://www.glutino.com/our-products/gluten-free-pantry/perfect-pie-crust/
One caveat to remember is that simply because something is gluten-free doesn't mean that it is good for you. This mix is loaded with super-refined flours and starches and even sugar (boo), so it is still a dessert BUT when I'm hankering for pie in a pinch, it works!
However, there are some tricks to getting this (and probably any gluten-free) pie crust to behave. Because it is lacking in gluten - which is the sticky business that keeps most flours together - it needs some help staying cohesive. The mix calls for an egg (which is an excellent binder) as well as a bunch of butter and shortening (yum) and some apple cider vinegar. Once mixed, the recipe calls for the entire mix to be wrapped and refrigerated. And that's essentially where the helpful hints end.
SO - here's a little extra assistance in whipping this pie crust into some pie-reminiscent shape:
1. Remove from refrigerator. Split dough into two halves (1 half pictured here).
2. Place dough on large sheet of waxed paper.
Using your hands, smoosh dough into a circleish shape.

3. Cover with a second large piece of waxed paper....

...making sure that there is enough extra paper to hang over the edge of the counter.

4. Lean your hip against the portion of the waxed paper that is hanging over the edge of the counter (this keeps it from slipping and running away while you roll).
Using a rolling pin, starting from the center, roll over the dough, making a circle-ish shape.

5. When you're finished, the dough should be a little larger than the pie pan (and it smooshes outside of the waxed paper sometimes, too.

6. Gently peel off the upper layer.
*if the dough is too sticky, chuck it into the refrigerator for a few minutes.

7. Picking up the bottom layer of waxed paper, flip the dough into your pan and press down.

8. If you're lacking a bit on the edges, steal some from other parts that are hanging out too far.

9. Stick the whole thing in the freezer for 5-10 minutes.
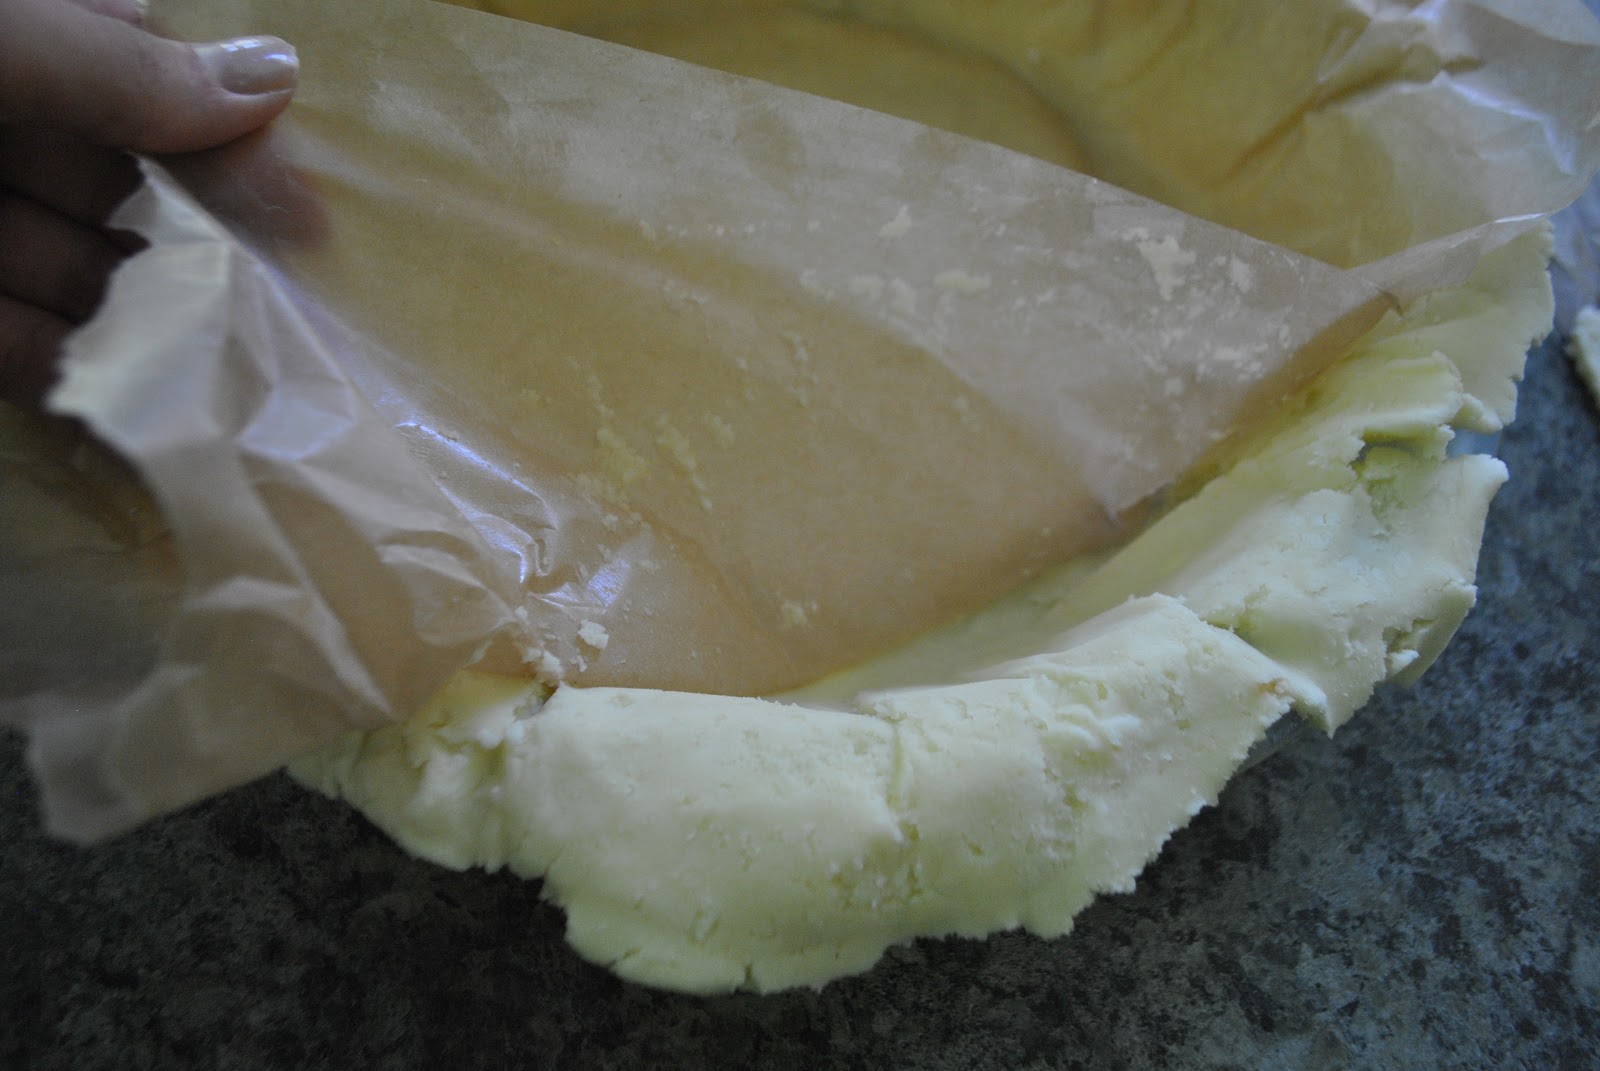
10. Remove from the freezer and slowly peel back the waxed paper.

11. Your crust should look sort of like this...

12. Fill your pie
(I used eight local golden delicious apples, 1/4 cup maple syrup, lemon juice, and apple pie spices).
13. Repeat steps 1-6 with the second half of your dough.

14. Flip the top crust over the top of your pie.

15. Peel the waxed paper back slowly...

...mending any holes with extra dough.

16. Remove the excess dough from the sides and seal your edges.

You can put these back into the refrigerator for your kids to play with later. Or make a little pie or something, if you don't have any kids.

17. I wanted my pie to look normal - I'm tired of trying to make "perfect" things, and equally tired of reading about all the perfect things that everyone else makes. So here is the non-Photoshopped version of my real pie, complete with mended portions (where I got a little impatient with peeling off the waxed paper).

18. Prick a few little holes in the top to let any steam escape and stick in the oven for the recommended time (I let mine bake at 350 F for probably an hour, or until the crust is semi-golden and looks "done"). A note on GF crusts - they usually don't brown in the same way as gluten-y ones do, and are usually much lighter.

And, voilá! A not-so-perfect but perfectly tasty gluten-free pie! Yum and yum!